How to configure SystmOne for the LIVI Practice service
Set up slot types, rota template and appointment book
Add GPs to SystmOne (Smartcard Role)
System Administrator Rights
If the GP Practice want LIVI to carry out the configuration they will need to create a System Administrator role for the LIVI staff. The quickest process is for the GP Practice to create a Local Generic System Administrator role. The preferred option would be a Smartcard Role assigned to the Users by the RA. Refer to the Guide here on how to get the right access.
The local generic System Administrator role enables LIVI to begin the configuration of the site whilst waiting for Smartcard Roles to be created by the RA/Sponsor or LIVI Sponsor. Never create real local users on SystmOne - always set them up with a Smartcard Role which will then create their SystmOne account the first time they log in with their smartcard.
Create a Branch Site
Select Setup > Users and Policy > Staff and Organisational Setup:

Select Branches > New Branch:

Fill in the branch details.
Name: Livi Practice
Address: The Practice Address
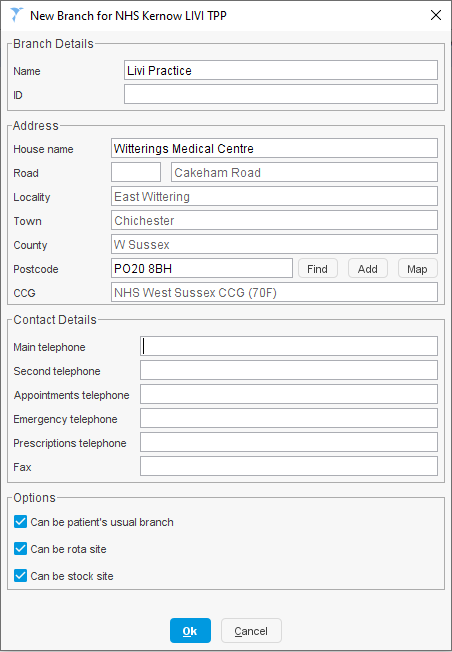
Click on OK
Create a Generic GP Account (for Rota)
A generic account needs to be created to assign a Rota to. Create a generic GP called Dr LIVI.
Setup > User & Policy > Staff & Organisation setup - select New Staff.
Firstname: Dr
Surname: Livi
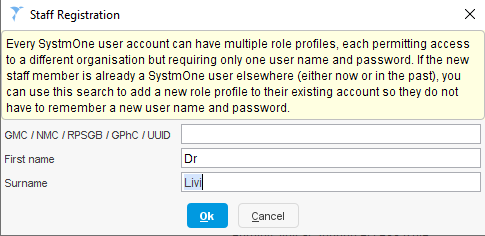
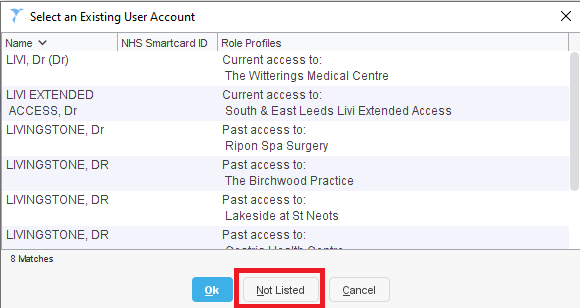
Click OK. On next window select Not Listed:
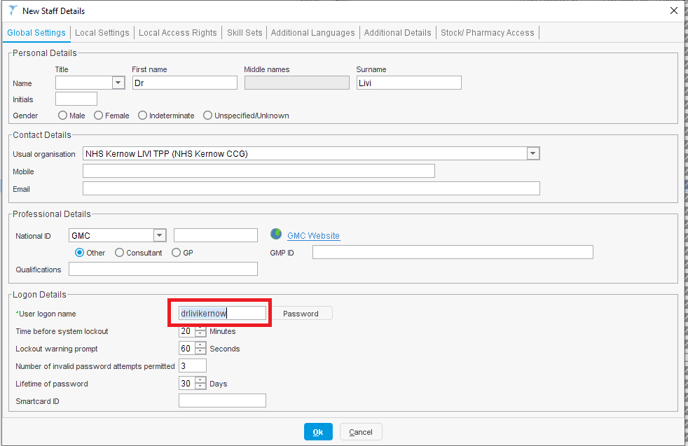
Create a User logon name
User logon name must be unique on the whole SystmOne network. You cannot have the same username on to different instances of SystmOne. Use the Partner name in the Username to make it unique - i.e. drlivi<partnername>:
Add the Employment role of Clinical Practitioner Access Role:

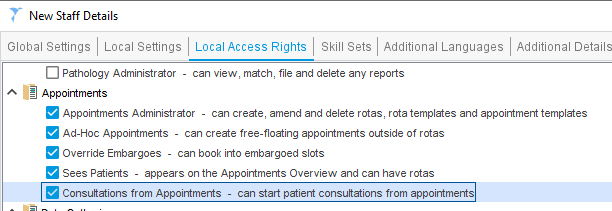
In the Local Access Rights section check the Appointments access rights boxes:
Set up a task group
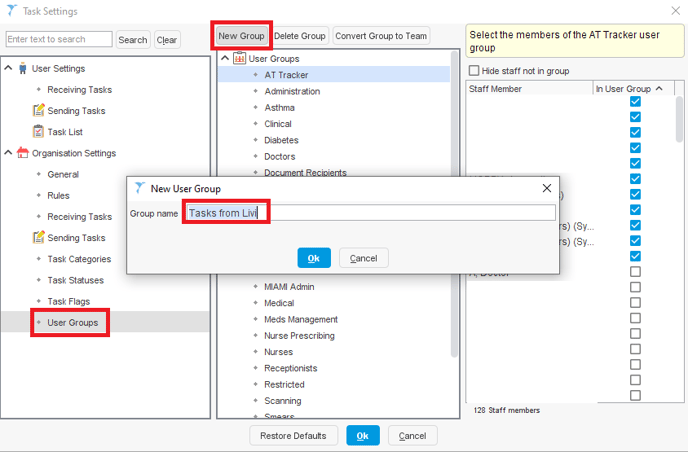
Any referrals required will be tasked back to the practice. Please create a task group called “Tasks from Livi” and add in all relevant practice staff, to ensure that anything passed back to practice can be picked up.
There will be some tasks that are urgent e.g. some 2ww referrals require the GP to complete tests prior to the referral. These tasks will be marked as urgent in the EMR and the practice should be monitoring / action these within 1 working day.
Select Workflow > Task List
Select Settings:
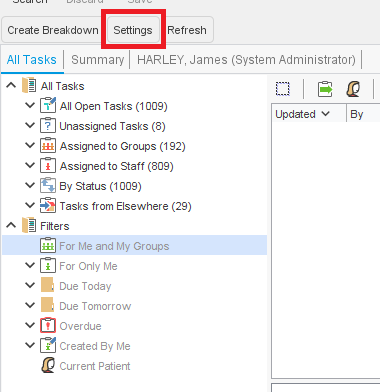
Select User Groups, click on New Group - create a group "Tasks from Livi":
Once created, inform the Practice to start adding users to this Team (by checking the boxes) who they wish to action any tasks sent back by a Livi GP
Set up slot types, rota template and appointment book
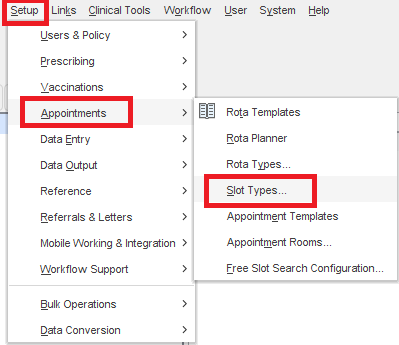
To create a slot type Select Setup > Appointments > Slot Types:
Select New Slot Type:

Create LIVI ONLY slot type as per screenshot below and click OK:
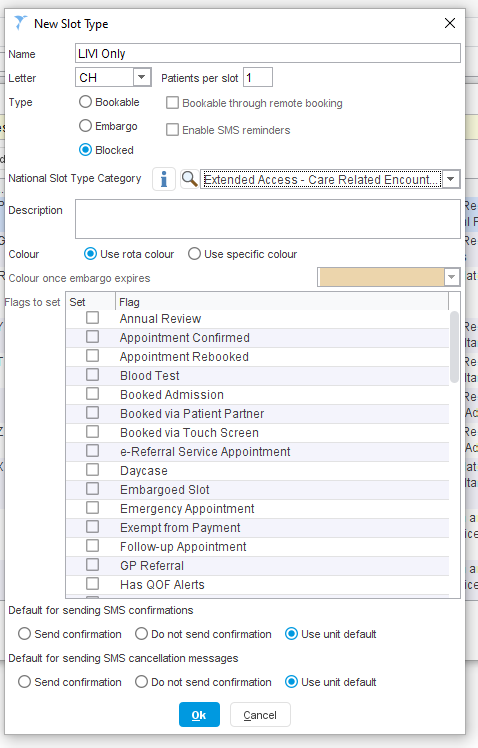
You can create another type and name it LIVI ONLY BLOCKED if you’d like those slots to be blocked.
Select Setup > Appointments > Rota Templates:

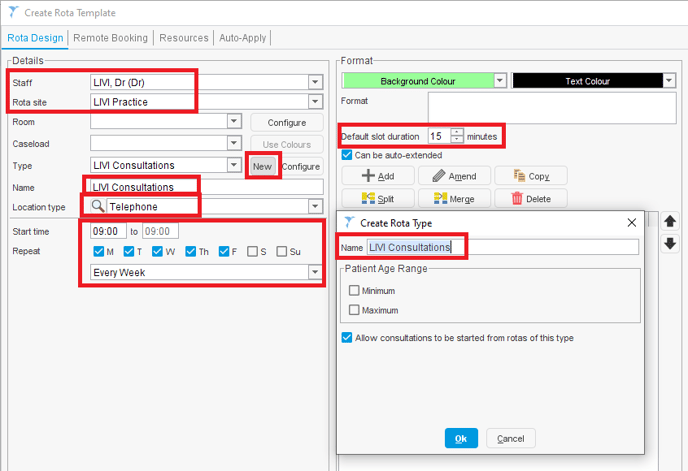
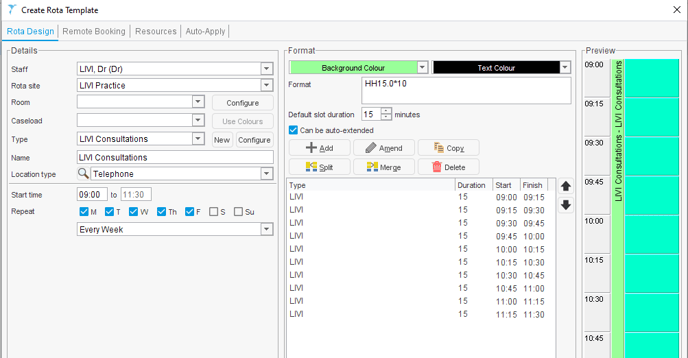
New Template > Rota Design

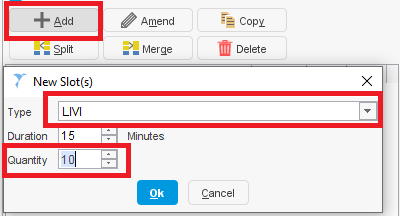
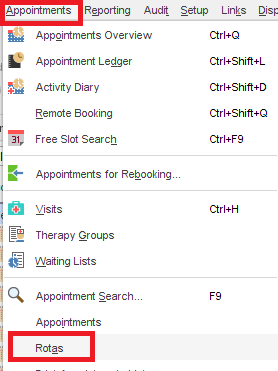
To create appointment book select Appointments > Rotas
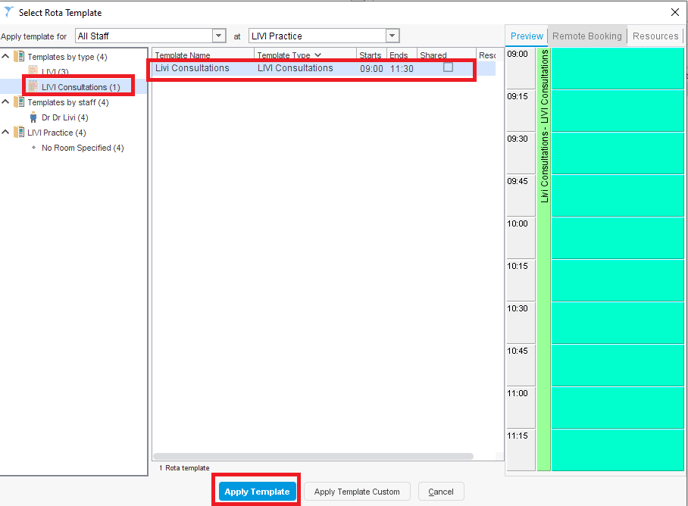
Click the Apply Template button:

Apply Template for Livi Practice. select the checkbox next to the required template and click Apply Template:
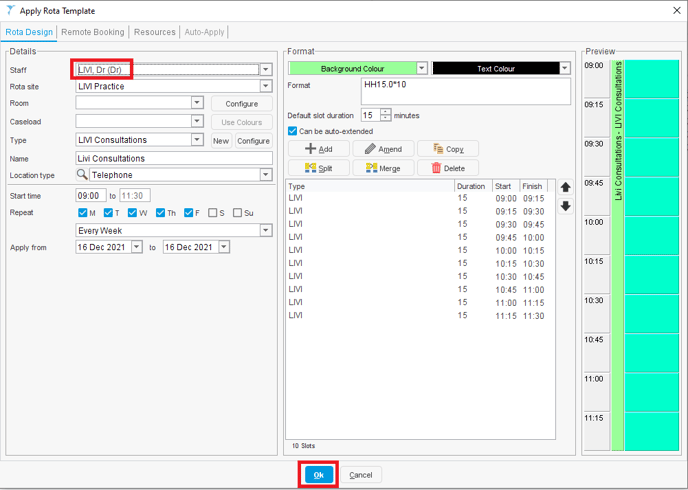
Make sure the Staff is Dr Livi and clcik on OK:
Add GPs to SystmOne (Smartcard Role)
GPs will need to have a Smartcard Role of Clinical Practitioner Access Role created by the Registration Authority/Sponsor or the LIVI Sponsor Administrator.
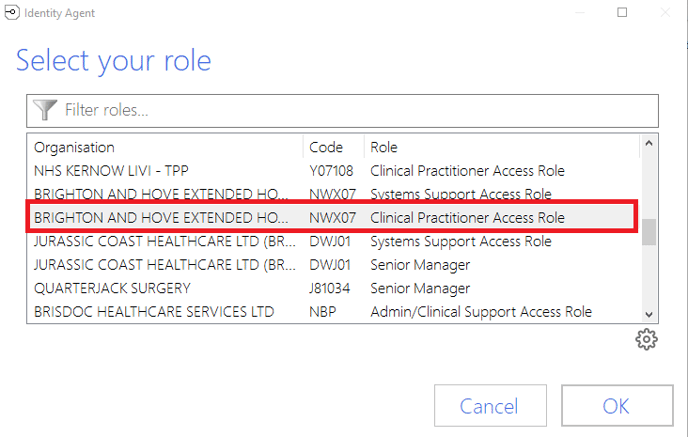
As soon as the GP logs into SystmOne via their Smartcard Role their account is created on the system.
Add PPA ID to GP Account
Once the GP has logged into SystmOne the Livi Admin user can either assign a PPA ID to a GP or use a another GPs PPA ID (Using PPA ID):
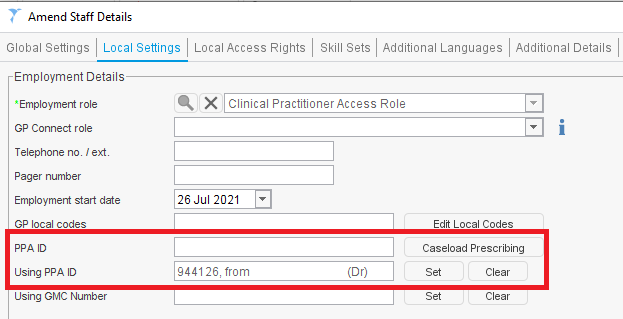
If using Using PPA ID, click on the Set button and pick the user whose PPA ID you will be using.
See more about PPA IDs here.
Templates
Templates (such as 2WW) in SystmOne can be viewed by going to Setup > Data Entry > New Template Maintenance.
All SystmOne templates are in .xlm format. Templates can be imported and exported:

To import a template, select Import Templates and navigate to the .xml file(s) on your local machine:

Select Create New:
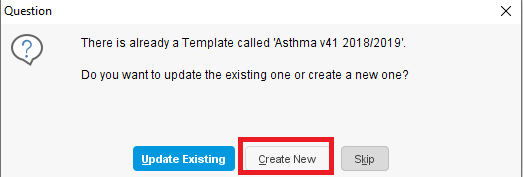
If it is the first import you may want to create a Category (i.e. LIVI) and a Sub category (i.e. 2WW) and then use the same for all other 2WW Templates you import for LIVI (so they are all grouped together). You can rename the Template, select an Icon and give it a description:

You will then be reminded you need to Publish it first:
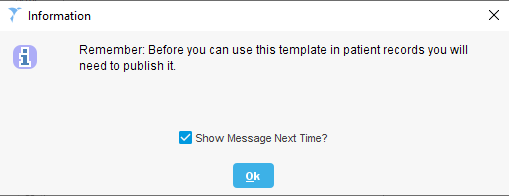
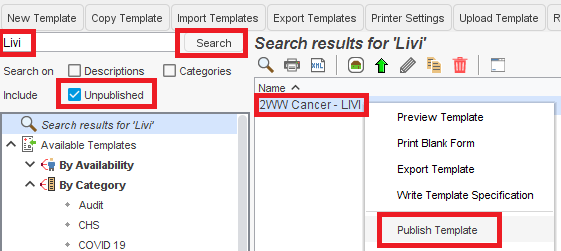
To publish, do a search on LIVI, check Unpublished. Right click on the unpublished template and select Publish Template:
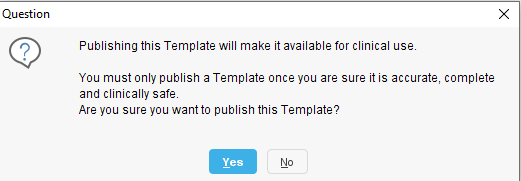
Click on Yes if you are happy with the template:
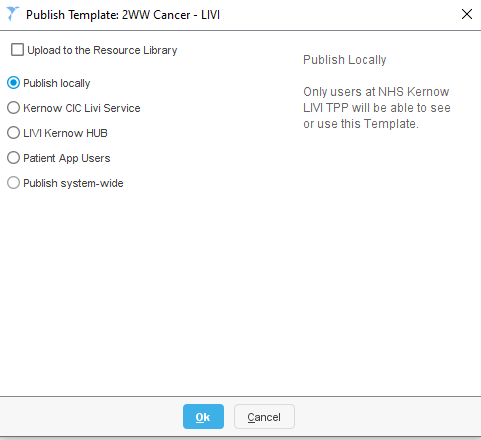
And select Publish locally:
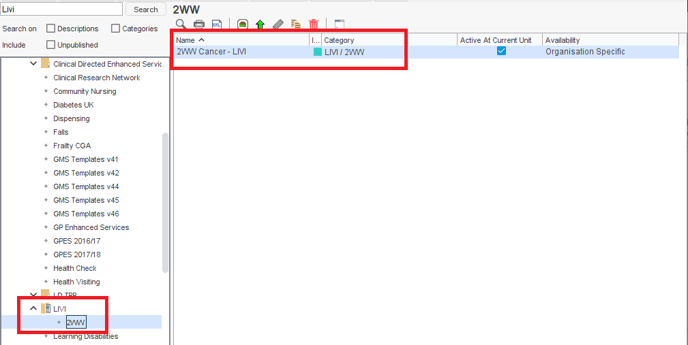
The Template will then be easy to find in the menu by the Category and sub category:
Testing Templates
To test a template a user must have Save Records access: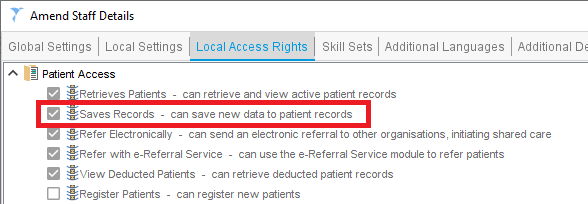
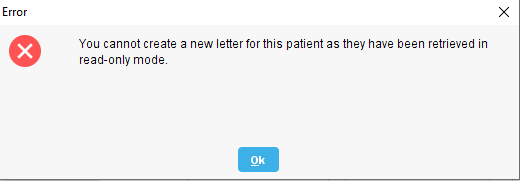
If the user does not have Save Records access they will get the following message when trying to open a Template:
