User Guide on setting up Users, Installing Odyssey and using Odyssey. Clinicians can ignore the Admin Staff Section.
Admin Staff
1. Create EMIS Accounts
Create User accounts on EMIS
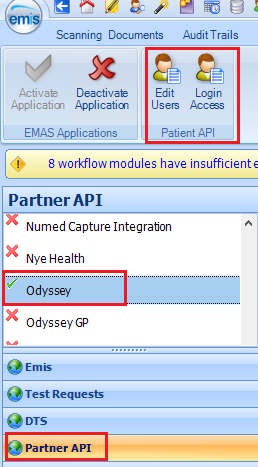
2. Enable Users for Odyssey API
In System Tools > EMAS Manager select Partner API. Scroll down and find Odyssey. Select Edit Users. Check the users that will use Odyssey (password can be anything). Select Login Access. Check both Auto Login and Allow Login check boxes for the users.
3. Download Odyssey Client
Using Internet Explorer go to https://livi.odysseyweb.advanced.thirdparty.nhs.uk/Client/
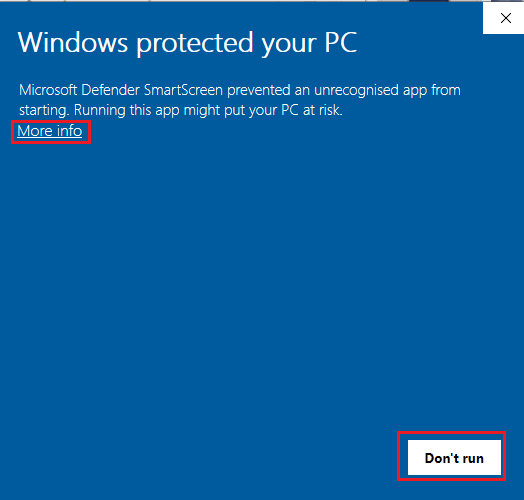
Download and Install.
You will get the Window Protected your PC message. Click on More info:
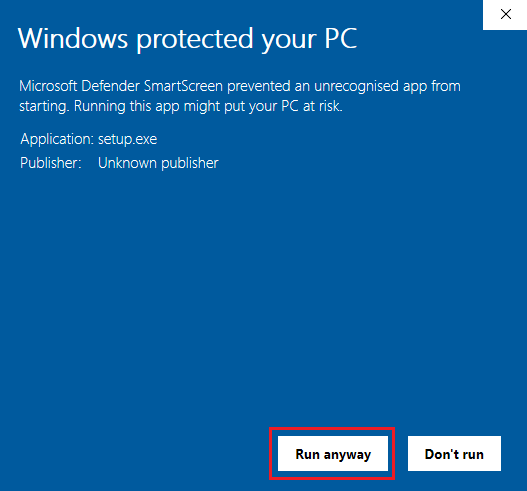
and select Run anyway:
When Odyssey has completed installing there should be an Icon on your Desktop:

4. Creating Users in Odyssey
Run Odyssey (make sure EMIS is closed)
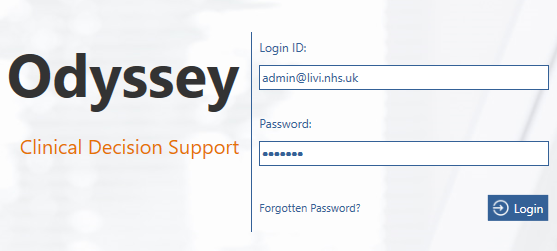
Login with the admin credentials:
Select User Admin:

Select Integration Users:

Select New User:

Add the Users full name and title replicating their Emis User name and title and check Clinician. Click on Save Changes:
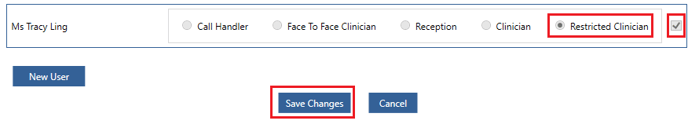
You must maximise the browser window to be able to see the Save Changes button above.
The difference between Restricted Clinician and Clinician, Clinicians have the ability to bypass the traige stage if they believe it to be urgent, however, Restricted Clinicians will have to complete all important questions on the traige without the ability to bypass to complete the traige. Restricted Clinicians permissions will be based on what permissions the organisation has allowed that role but normally the above is set by default.
Clinicians
Install Odyssey
Download and Install Osyssey following step 3 above.
Log in to EMIS (Org ID 141646).
Open a Patient in EMIS (before opening Odyssey)
Run Odyssey from your Desktop:
Support
Users should call 0330 343 0067 to contact the Service Desk or via the support portal - https://www.oneadvanced.com/support-centre/ if they are having issues.