This article covers how to send a Now Message to patients.
A Now Message is an ad-hoc message that you can send whenever you need to. It may be to contact a single patient, or notify a selection of patients that they should contact the surgery / hospital. The content of the message can be from a template or entirely at your discretion, and Now Messages can be a powerful tool to contact patients in an easier and more effective manner than by post or telephone.
On this page:
- Sending a Now Message
- Editing your message
- Delivery Priority
- Communication Settings
- Select Recipients
- Send Messages
Sending a Now Message
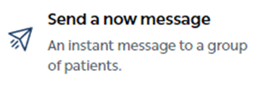
- From the Home Page of Mjog, click Send a now message:
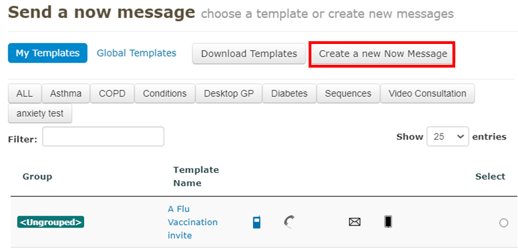
- Select a message template, or click Create a new Now Message:
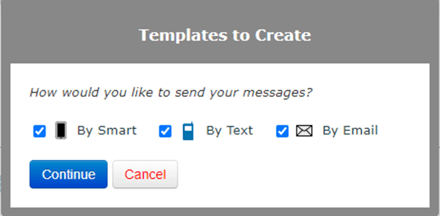
- After selecting a template (or Create a new Now Message), if you have multiple delivery methods available (for example text and email) you are presented with a dialog asking how you would like the messages delivered. Select as appropriate:
Editing your message
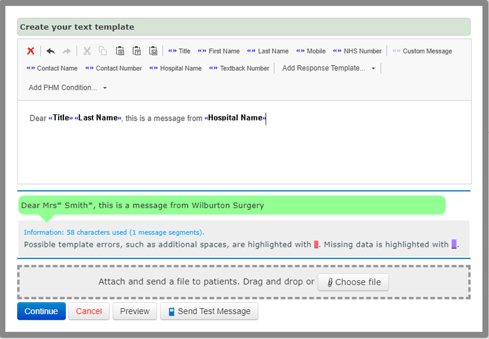
- If you have chosen Create a new Now Message, the editor will open for your first delivery message i.e., Smart; compose your message; use the fields on the toolbar to insert details such as Title / Last Name, etc., and then click Continue:

- The editor will open for the SMS template; compose your message:
- Repeat the previous two steps for any other delivery methods that you are subscribed to.
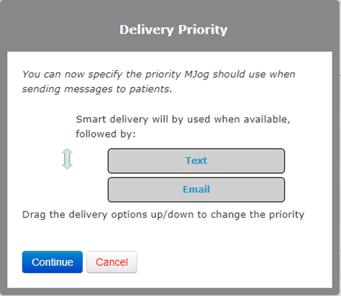
Delivery Priority
- If you continue with multiple delivery options, you will be presented with the delivery priority dialog where you can choose the priority Mjog should apply when the messages are sent. Re-order the delivery priorities as required, and then click Continue:
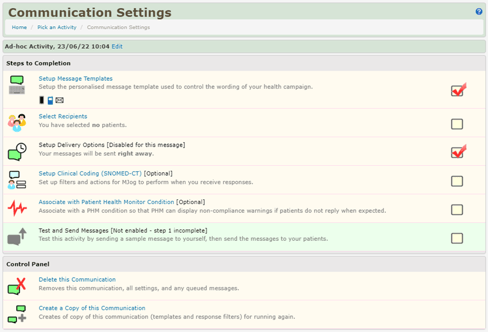
Communication Settings
The Communication Settings page opens, which will guide you through the remaining steps to send your now message:
- Select Recipients: Who is receiving the message.
- Setup Clinical Coding: Optionally code the delivery of your message to the patients clinical records.
- Test and Send Messages: Review your message before sending it to the patients.
Select Recipients
- To add patients click Select Recipients:

Select Recipients takes you to the Patient Selection screen:
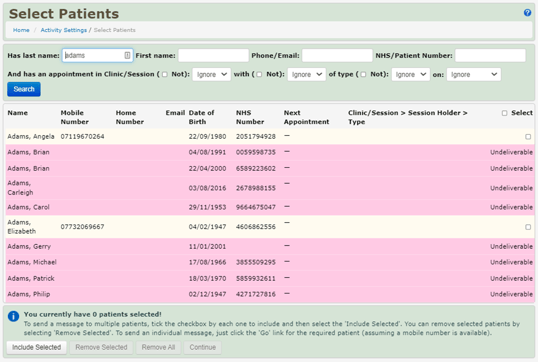
Within the ‘Patient Selection’ screen you can search for patients by name, phone number, NHS/Patient number of by upcoming appointments. These options can be combined, for example to include all patients that have an appointment tomorrow and a last name begging with ‘a’.
- Once your selection has been made, click the Search button to find matching patients:

- If matching patients were found you will see the list below the search fields. If a patient can be contacted a ‘Select’ check box will be present on the right hand side and the patient can be included in your selection by checking the checkbox:

Once you have selected the patients you wish to include, click Include Selected:

You can now search for include additional patients by repeating the steps above.
Once your selection is complete click Continue:

Note: If searching based on appointments Mjog will automatically check , those appointments that have already occurred will not be selected automatically, but can be added to the selection by checking the box on the right of each appointment.
Tip: You can print this page using the Print this Page button at the bottom of the screen (handy if you want to call each of the appointments highlighted in pink).
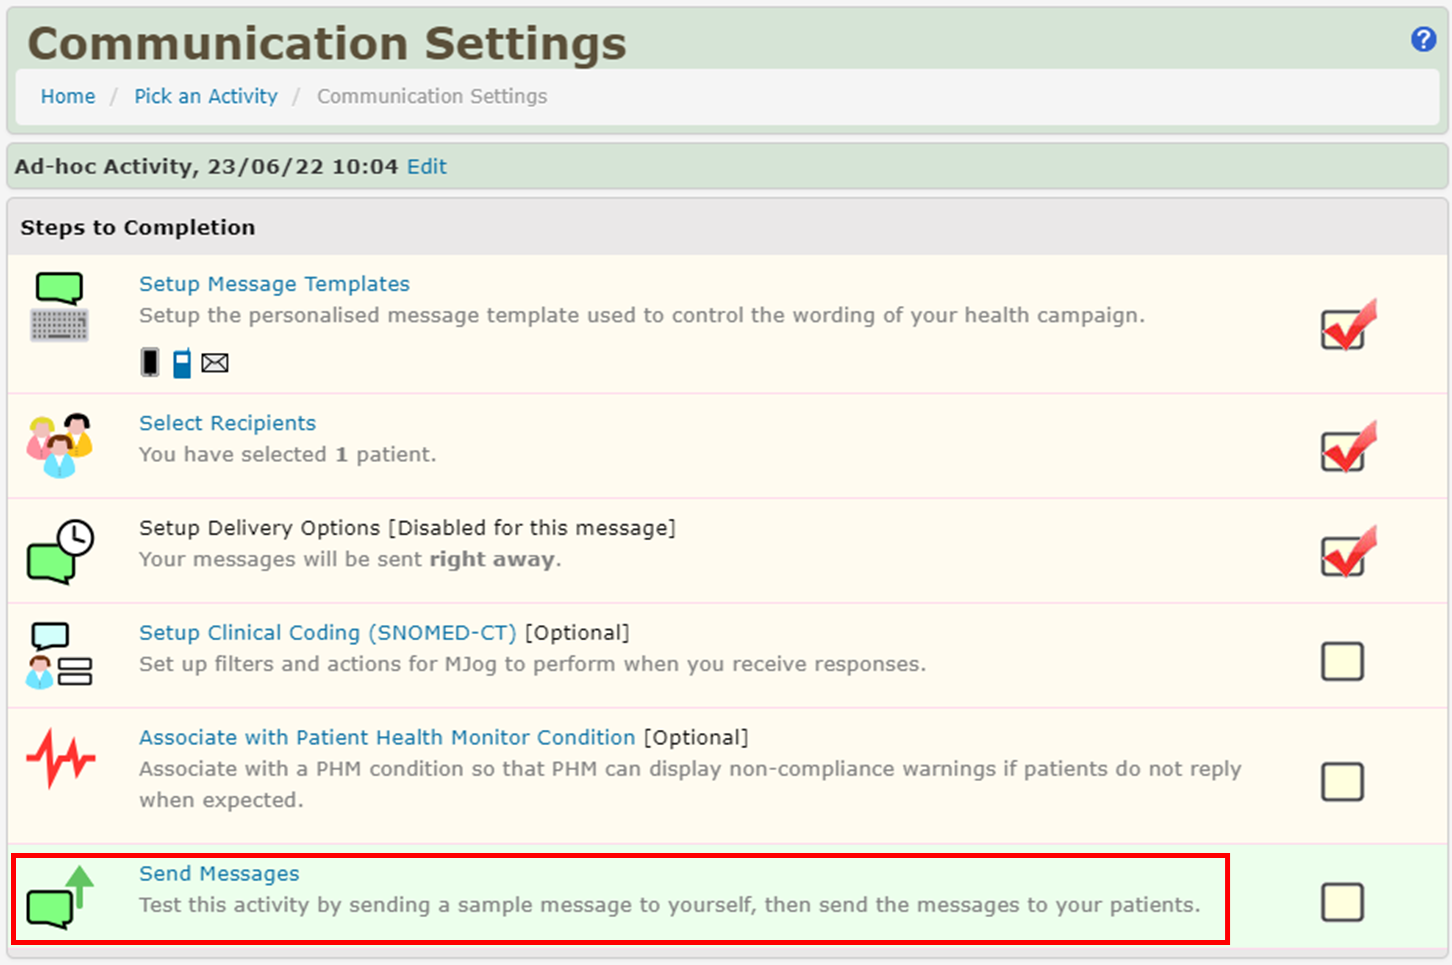
Send Messages
From the Communication Settings page, clicking the Test and Send Messages link takes you to the Activity Summary page. The summary page provides an overview of your selection and settings and offers you the opportunity to send a test message to yourself prior to sending the actual messages:
You can see a summary of your Now Message, advising you how many patients are included and the day, date and time that the message will be sent. You can also check the phrasing of your message again in the Message Preview: area. Mjog will have selected a patient from your Now Message as an example:
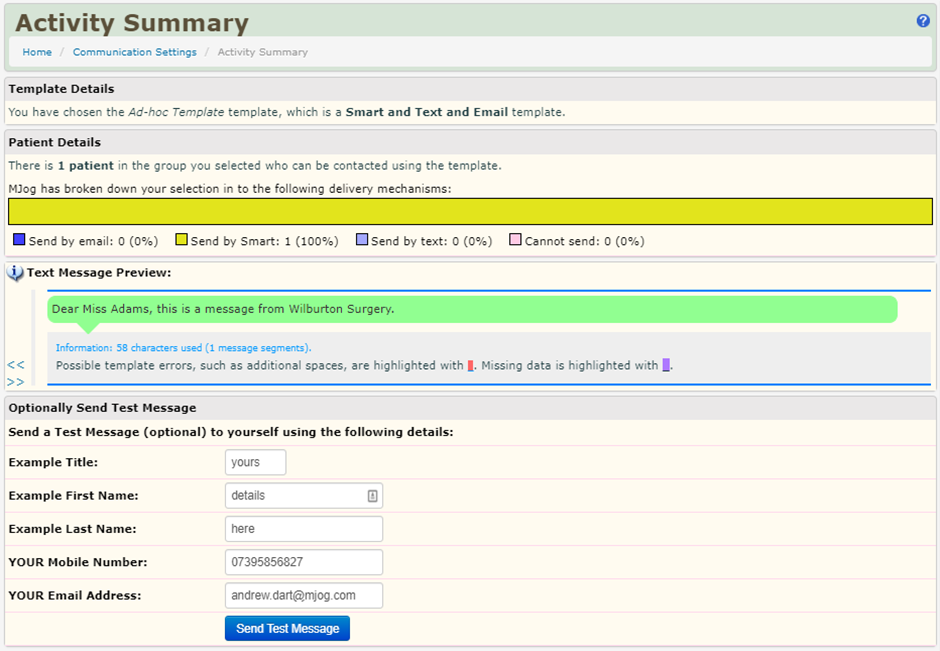
- In the Optionally Send Test Message panel, you should enter the Title, First Name, Last Name and YOUR (or a colleagues) Mobile Number. This allows you to send a test message to yourself so you can check exactly what the test message will look like. It is sometimes easier to spot any mistakes this way. The test message will come through in a few minutes regardless of when you have set the delivery options:
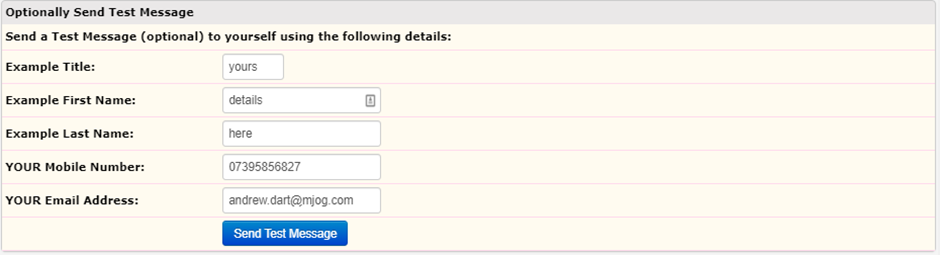
- Click on Send Test Message to send the test message to the mobile number you have entered. Mjog will confirm that the message has been sent and we always suggest waiting for the message to arrive before continuing.
- Whilst you are waiting for your test message, decide if you would like your test mobile number to also be added to the campaign. This means that, as long as the campaign is being sent more than 24 hours ahead of the test message, you will receive another copy of the text. This can be useful to confirm that the message has gone out, or to act as a reminder if you are setting the message to be delivered sometime in the future. Simply tick the box to include yourself:

- After receiving your test message, click Send Messages to confirm that your Now Message is ready to be sent immediately.