Table of Contents
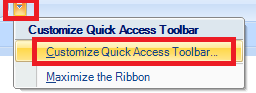
Customise Quick Access Toolbar
Care Record Data Sharing Agreement
How to Trace a Patient
Booking a Patient into the Appointment Book
Accessing Consultation notes and Documents
Viewing and completing Tasks
Reporting
Send a Screen Message
EPS Prescription Numbers
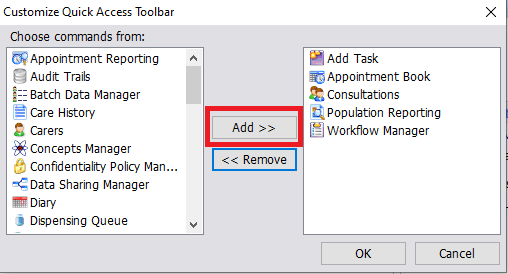
Customise Quick Access Toolbar
LIVI recommends you add the following commands to your Quick Access Toolbar (located at the top of the EMIS Window):
Care Record Data Sharing Agreement
For System Administrators only. To view the Care Record Data Sharing Agreement (to check which GP Surgeries are sharing their patient records with the BrisDoc EMIS Hub) select the EMIS Bubble > Configuration > Data Sharing Manager
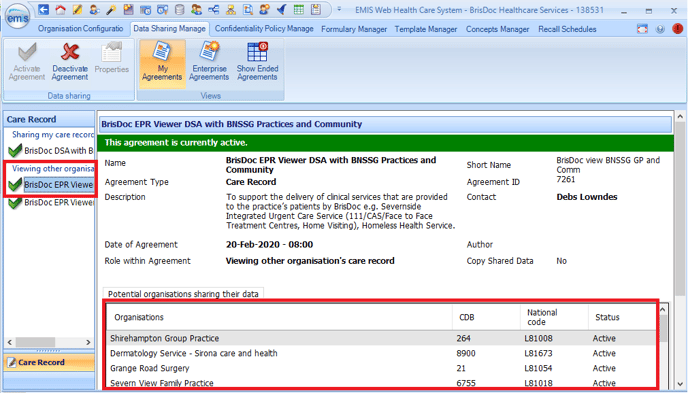
Click on the BrisDoc EPR Viewer DSA with BNSSG Practice and Community Data Sharing Agreement that sits under Viewing other organisation's care record. All Organisations will be listed showing their Status. If the GP Practice has not enabled the Data Sharing Agreement the status will show as Inactive which will mean their patients cannot be traced onto the BrisDoc Hub and therefore the GP will not have access to the care record.
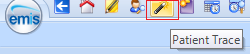
How to Trace a Patient
Select the Patient Trace button on the Quick Access Toolbar (the wand):
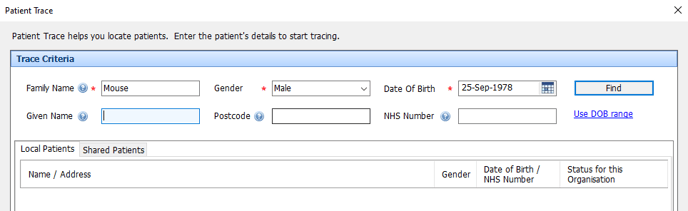
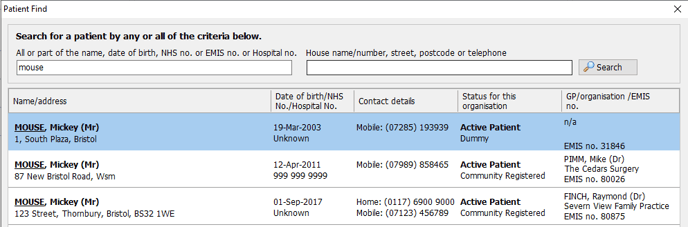
Either enter the patients Family Name, Gender and DOB or their NHS Number and click on Find:
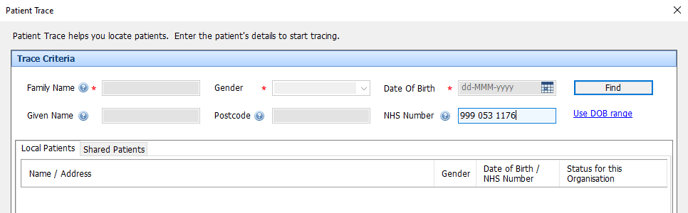
The system will search for the patient from all the sharing practices. When found, and it's the first time the patient has used this service, they will be displayed under the Shared Patients tab:
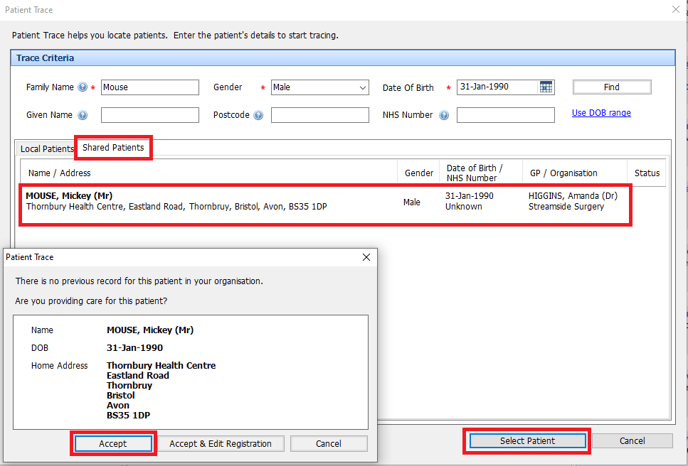
Check it's the correct patient and click on Select Patient. On the next pop up window select Accept.
The patient will be traced into the EMIS Hub and shown as the active patient on the toolbar:

The next time the same patient comes through this service they will be displayed under the Local Patients tab when Traced as they have already been accepted into the EMIS Hub.
Booking a Patient into the Appointment Book
Open the Appointment Book from the Quick Access Toolbar.
The LIVI Appointment Book should be visable.
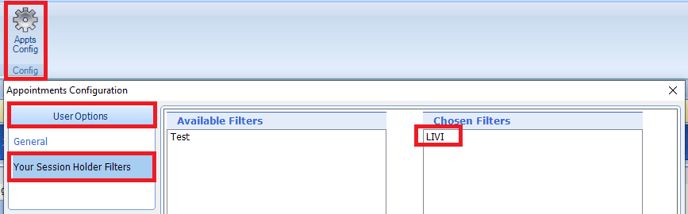
If you cannot see the LIVI Appointment Book select the Appts Config button, under User Options select Your Session Holder Filters and choose LIVI (you will only need to do this once):
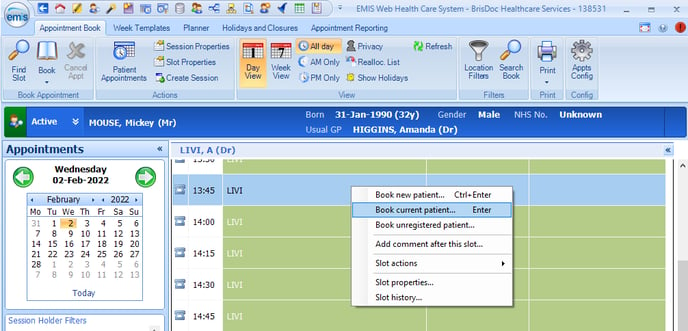
Making sure the patient is still active, Select a suitable time slot, right click and select Book current patient...
Enter a Reason and cut and paste the 111 notes from Adastra to the Booking notes field. Click on Book:
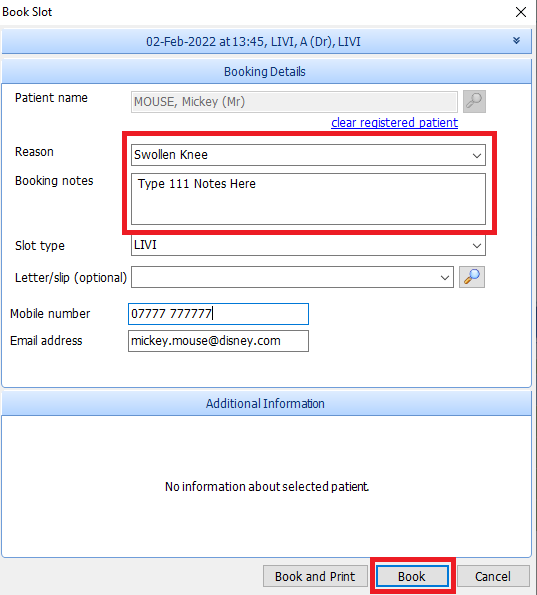
The booked slot will display the Patient's name, the reason for the booking and the 111 notes ready for the LIVI GP:

Accessing Consultation notes and Documents
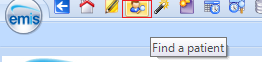
To view a patients consultation notes and documents you must navigate to Consultations. Firstly find the patient by clicking on Find a patient (head with looking glass):
Type in part of the name, DOB, NHS No etc and click on Search. The patient should be listed. Select the Patient and click on OK.
With the patient active (blue bar) open their Consultations from the Quick Access Toolbar (two heads):

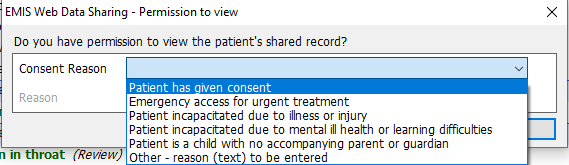
You will be prompted if you have permission to view the patient's shared record:
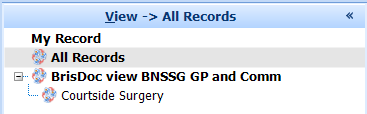
In the View Panel on the left you have a choice to look at the Hub Consultations, GP Practice Consultations or both (All Records):
The GP Practice patient records will show as a Shared Record represented by a red and blue symbol:

Encourage GP Practices to make All Records the default view in their EMIS Instances so they will automatically see any BrisDoc LIVI consultation notes - instructions here
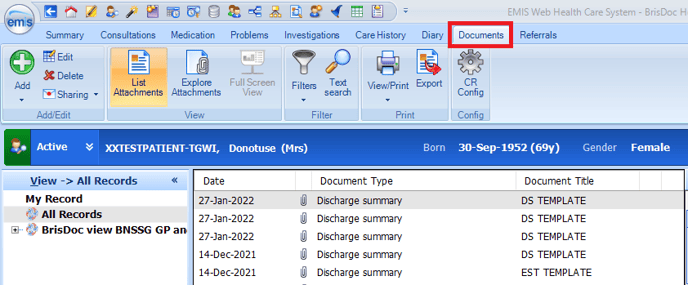
To open a document (such as a Discharge Summary) simply double click on the paperclip within the record. To view all Documents in a single view select the Documents Tab when in Consultations:
Viewing and completing Tasks
LIVI GPs will send Tasks to a group called 'Tasks from LIVI Urgent Care'. Any user who is a member of that group will see the task in their Task To-do List.
To view the Task To-do List open the Workflow Manager from the Quick Access Toolbar:

Within Workflow Manager the Task Menu is in the left panel at the top. Click on the To-Do List to display all Tasks. If the Task Subject is a patient then that patients record will be opened automatically (blue bar).
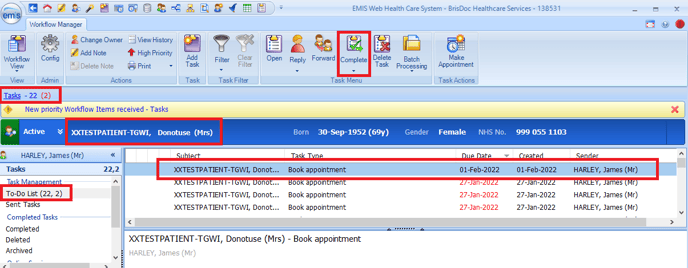
The number of To-Do tasks will also be displayed under the toolbar so you can see how many there are without having to go into Workflow Manager. In the example above there are 24 To-Do Tasks, 2 which have been marked urgent (red arrow). Clicking on these numbers will also take you to Workflow Manager.
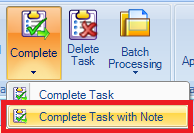
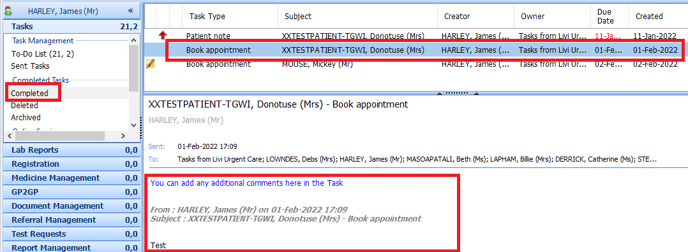
To Complete a task, highlight the task and click on the drop down arrow under the Complete button and select Complete Task with Note:
A warning will flash up. This is because there are many members in the 'Tasks from LIVI Urgent Care' group. The first person to complete the task will complete it for all members.
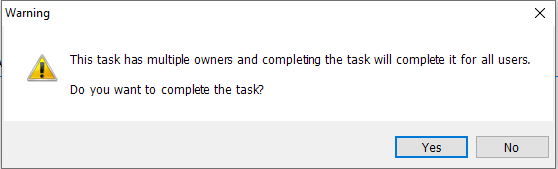
Click on Yes and then you have the opportunity to add any additional notes:
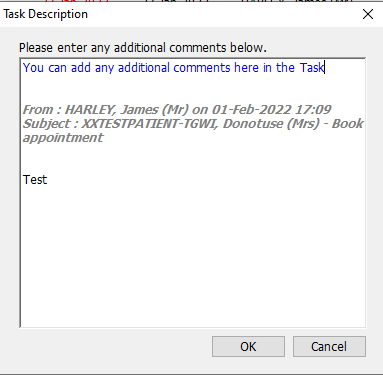
Click on OK to complete the Task. The task will move to the Completed folder:
Reporting
There have been 2 reports created to show the status of LIVI Appointments and the Outcomes of Consultations.
To run the reports open the Population Reporting from the Quick Access Toolbar:

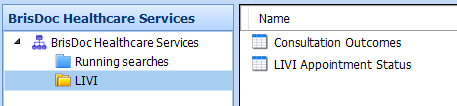
Click on the LIVI folder. Here you will see the 2 report templates:
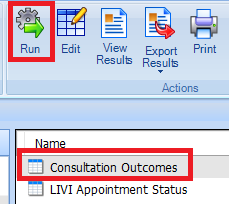
To run a report, highlight the report you wish to run and clcik on Run:
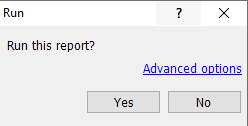
Select Yes to the Run this report pop-up message:
You will be prompted to enter a Date Range:
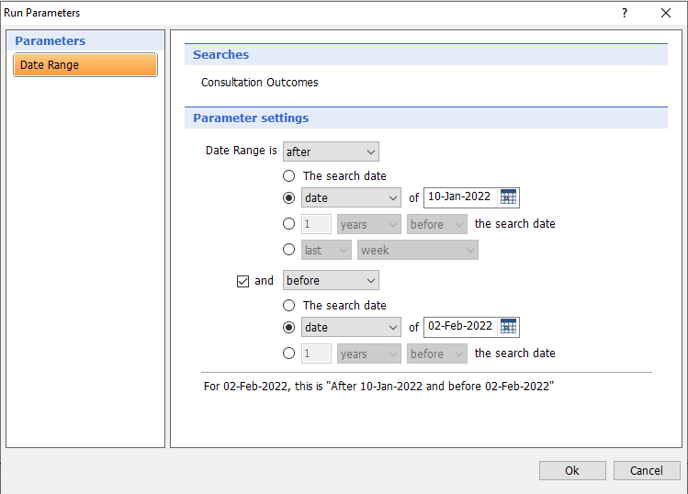
Enter the desired data range and click on OK. Whilst running the report the Last Run status will show Queued:

When completed the Last Run status will show the date it was last run:

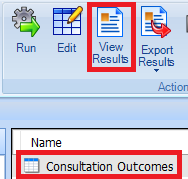
To view the results, highlight the report and click on View Results:
Reports can also be exported to xls, .csv, .pdf or HTML. When viewing the results click on Export and choose the desired output format:
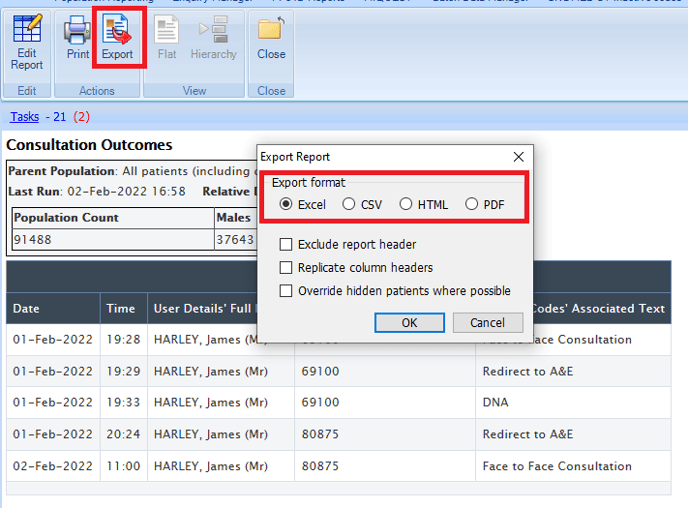
Click on OK and choose the location on the local device where you would like to save it.
Send a Screen Message
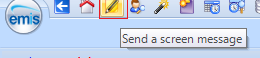
To send a Screen Message open the Send a screen message from the Quick Access Toolbar:
Type your message, click on Show Online Users, check the user(s) you wish to send the message too then click on Send:

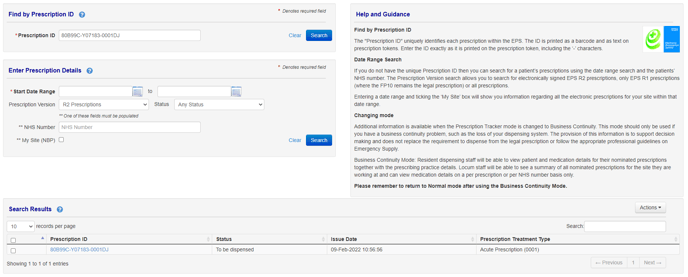
EPS Prescription Numbers
To view an EPS Prescription number click on 'Electronic R2 (Stored)' text next to the EPS and in the pop up window the prescription number will be shown:

Prescriptions can be tracked on the National EPS Prescription Tracker site - https://portal2.national.ncrs.nhs.uk/prescriptionsadmin/